MyPict User Guide
Comprehensive guide covering shapes, layers, slides,
shortcuts, and export settings.
Table of Contents
01. Placing Shapes & Basic Operations
Add rectangles, arrows, speech bubbles, and more from the "Insert" menu at the top.
Added shapes can be moved by dragging and transformed using the surrounding handles.
Basic Controls
- Move: Drag the shape.
- Resize: Drag the white square handles on the corners or edges.
- Rotate: Drag the white circle handle above the shape.
- Adjust Radius: Use the yellow handles on shapes like rounded rectangles.
Quick Toolbar
When you select a shape, a small toolbar appears nearby. You can quickly change "Fill", "Border", "Arrangement (Bring to front, etc.)", and "Text Orientation" here.
Cropping Images
Select an image, Right-click → "Crop" to trim unwanted areas. Press Enter to confirm.
02. Text Input & Editing
Double-click a shape to enter text. You can also add text-only elements via "Insert" → "Text Box".
Selecting text displays the "Text Toolbar" for changing font, size, bold, alignment, etc.
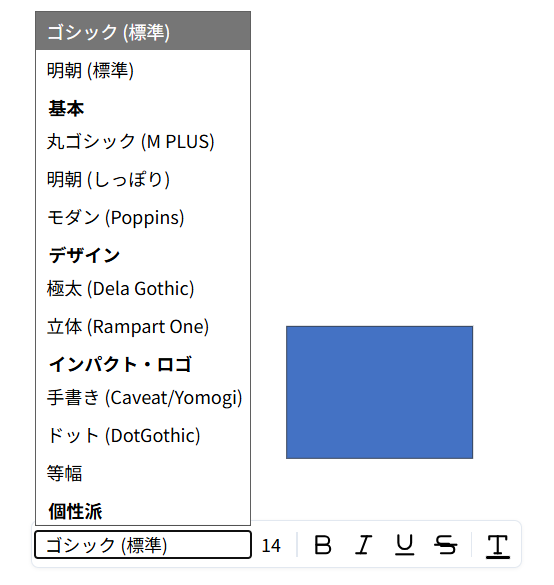
Text Toolbar
A dedicated toolbar appears above your selection while editing text.
- Font: Choose from Gothic, Mincho, Handwriting, Dot styles, and more.
- Size: Adjust text size.
- Style: Apply Bold, Italic, Underline, or
Strikethrough. - Color: Choose from standard/theme colors or use the color picker.
03. Organizing Objects (Grouping)
Use "Group" to handle multiple shapes as a single unit.
You can also quickly change the stacking order via the right-click menu.
How to Group
- Drag to select multiple shapes (or Shift+Click).
- Right-click on the selection and choose "Group".
- To ungroup, right-click and choose "Ungroup".
Changing Order
Right-click a shape and use the icons or "Arrange" options at the top of the menu.
- Bring to Front: Move to the very top.
- Send to Back: Move to the very bottom.
04. Right Panel: Colors & Effects
The panel on the right allows detailed settings for selected shapes.
You can adjust fill color, opacity, shadows, image corrections, and more.
Main Settings
Image Adjustment
Adjust brightness, contrast, saturation, blur, etc. using sliders (Images only).
Box Shadow
Add drop shadows to shapes. Fine-tune color, opacity, distance, and angle.
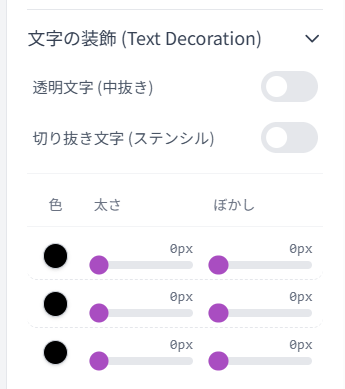
Text Decoration
Set text borders (strokes). See "Advanced: Outline Text" for details.
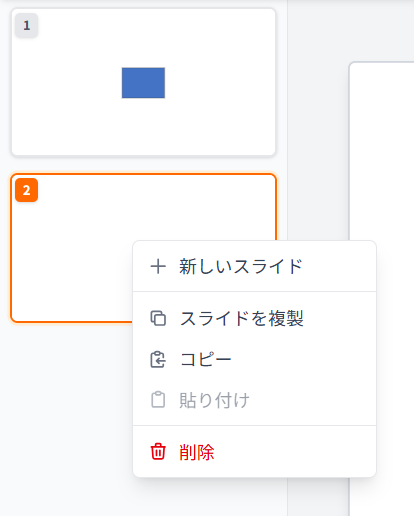
05. Left Panel: Managing Slides
MyPict supports multiple canvases (slides).
Manage your slides using the panel on the left.
- Switch Slides: Click a thumbnail to edit that page.
- Reorder: Drag and drop slides to change their order.
- Context Menu: Right-click a slide to "New Slide", "Duplicate Slide", or "Delete".
06. Useful Functions (Snap & Range)
The footer bar at the bottom contains switches to improve your workflow efficiency.
Snap Function
Toggle with the "Snap: On/Off" button.
When on, moving shapes will snap to the edges or centers of other shapes and the canvas center for perfect alignment.
Selection Mode
Toggle with the "Range Selection: Partial/Whole" button.
Determines whether dragging selects items that are "partially touched" or only those "completely enclosed".
07. Saving & Exporting
Save your design as a "project" for later editing or export it as an image file.
Export Selection (Recommended)
Export only selected shapes or groups. Perfect for creating clean assets with no extra whitespace.
- Select the shape (or group) you want to export.
- Right-click and choose "Export Selection as Image...".
- Choose a filename and format, then click "Export".
File Formats
- PNG: Supports transparent backgrounds. High quality.
- JPEG: Smaller file size. Good for photos.
- WEBP: Lightweight and high quality. Ideal for Web.
Other Options
Save Project (.myp)
Menu "File" → "Save Project" downloads a .myp file.
Load this file later to re-edit while keeping layers and text data intact.
Export Entire Canvas
Menu "File" → "Export as Image" saves the entire canvas (including empty space) as an image.
Canvas Settings (Presets)
Change canvas size or shape mid-work via "File" → "Presets".
Options include YouTube thumbnails, Icon shapes (circular clip), custom sizes, etc.
Outline / Stroke Text
Create bordered text designs, popular in YouTube thumbnails.
1. Open Panel
Open the "Text Decoration" panel on the right side.
2. Configure Stroke
Pick a color with the picker in "1" and adjust the thickness slider. Set "2" or "3" to add more outer layers.
Tool Integration
Bring assets from MyShape (cropping) or MyMetaballs (organic shapes) into MyPict via Clipboard (Copy & Paste) without saving files.
1 Copy & Paste Image
Right-click the image in the other tool and select "Copy Image". Then simply "Paste" (Ctrl+V or Right-click) in MyPict.
Appendix: Keyboard Shortcuts
Key operations to speed up your workflow.
The Shift key is especially useful for alignment and constraining.
Basic
| Ctrl + Z | Undo |
|---|---|
| Ctrl + Y | Redo |
| Ctrl + C / V | Copy / Paste |
| Ctrl + A | Select All |
| Delete | Delete selection |
| Arrow Keys | Move 1px |
Shift Key Usage
Hold Shift while performing these actions.
| Click | Select Multiple (Add/Remove) |
|---|---|
| Drag (Resize) | Maintain Aspect Ratio |
| Drag (Rotate) | Snap to 15 degree increments |
| Arrow Keys | Move 10px |
| Slider Input | Snap to nice round numbers |